
Introducing your new best friend: Continuous Integration
In a previous post, I discussed
the earth-analytics-python conda environment. I set this Python conda environment up to support the Python earth and environmental data science
courses and online lessons that I was developing and teaching at
CU Boulder.
In that previous post I talked about how Python conda environment files can help you make a more reproducible environment that other people can install.
However, I didn’t discuss how to ensure that the environment will work for those other people (and your future self!) on different operating systems (Windows, Mac and Linux).
In my courses, students often had machines with different operating systems.
A common pain point of teaching Python for earth and environmental data science
was ensuring students had a functioning Python environment.
Testing is integral for science and education
When I first heard about the idea of testing I thought – RUN – the other way - fast. This isn’t science.
I was wrong.
Testing is actually critical to science. Here’s why. If you want to create workflows that others can use, then testing is actually your best friend. Testing allows you to setup checks to ensure that:
- the environment runs on a computer other than yours
- the environment works on various operating systems
- You can even run code or import packages in your test build
Testing will help you create workflows that more people can access. It will also help your future self! Yes, you in 6 months to a year.
Testing is an integral tool for open science and education.
Don’t worry, testing isn’t as scary as it sounds
While testing may sound complex, setting up basic testing to see if environments install correctly on different operating systems is actually not too difficult. Especially if you are using GitHub.
Here I’ll break that all down for you!
Get started with testing a Python conda environment using GitHub Actions
When it comes to testing, your new BFF (best friend forever) will be GitHub and GitHub actions. There are other platforms that you could use, but if you are working on GitHub already, Actions is a no-brainer tool to use.
GitHub actions is Continuous Integration (CI). What does that mean?
GitHub actions is a Continuous integration (CI) platform. Continuous Integration, or CI, is a way to automate things.
Those things that you automate may include:
- Testing that an environment builds when you add a new package to it
- Testing that an environment builds using a different version of Python
- Pushing code to different repositories such as a live website repo from a dev repo
- Pushing a tool to PyPI for publication
- Running test suites that test functionality in Python packages (this is more complicated but just an example for this blog)
What are GitHub actions?
GitHub actions is a free-to-use continuous integration platform that works seamlessly with GitHub. GitHub actions run in the “cloud” on GitHub. The GitHub.com cloud.
Remember that git is the tool that runs version control. GitHub.com is a cloud based platform that runs git.
Using GitHub actions, your new super power enabled BFF (best friends forever), you can setup a workflow in the cloud (on GitHub) that runs your environment on 3 different operating systems (Linux, Mac and Windows).
You can
even test it on different versions of Python if you want to.
And it’s all FREE.
Am I blowing your mind yet?

When we first setup testing for the earth-analytics-python environment, we were using other CI platforms
such as Travis CI and Appveyor for windows. However I now use GitHub Actions. Actions is free as of October 2022. It nicely integrates
into all pull requests and changes that you make to the repository.
So let’s get starting breaking down how actions are setup.
First, figure define clearly what your testing goals are
In this post, your goal is to test a Python conda environment. I am assuming that:
- The environment.yml file already lives on GitHub.com in a repository. This is great because the environment is under version control.
- You can successfully build and activate the environmental locally on your computer.
Then you build an environment on your computer, you are only testing it on one operating system and one computer. Here, we want to build that environment on multiple operating systems:
- Windows, Mac and Linux
We also want this build to run any time that you update the environment on GitHub. This will test whether the environment still builds or not after you’ve say migrated to the next version of python (3.8 to 3.9) or added a new package to your environment.
When do GitHub actions run?
GitHub actions can be customized to run whenever you want them to run:
- When you make a change to your repository on any branch
- When you make a change to specific branches
- When someone submits a pull request
- Or even as a “Cron” job which means they might run once a week, or once a month regardless of whether a change has been made to the repository.
So how do you setup these actions?
Glad you asked - let’s talk about that next.
Testing the Earth Analytics Python environment with GitHub Actions
First - have a look at the actions file in our earth-analytics-python environment:
You may notice that actions the file is a .yml file. Just like our earth-analytics-python conda environment was. Remember in the previous blog
we discussed that these .yml files can be thought of as recipes of instructions
for doing something. Here, this recipe tells GitHub actions what to run in the CI job. It provides GitHub actions with
all of the steps that you need it to perform. These steps include installing the right
operating system.
Remember that YAML is at it’s most basic - a list of things. For environments and CI, it can be thought of a list that provides a computer with instructions to do something.
A job refers to a single “run” of the task or tasks specified on the action. So in this case when I say job, i’m referring to building the environment.
Where to you save your actions file.
To create your workflow with GitHub actions, you need to create a .yaml file
in the .github/workflows/filename.yml directory
in your git repo and then push that to GitHub.com. The directory structure
should look like this:
.github/
   workflows/
      envt-file.yml # this can have any name that you wish as long as it ends with .yml
Breaking down the pieces of the build
Similar to the earth-analytics-python environment file that we explored
in the last blog, notice that at the top of
this yaml file you can find the name: of the build.
In some cases you may have multiple builds in your
GitHub repo so naming each one uniquely is helpful.
name: Test EA Python Envt Mac, Linux, Windows
When do you want the action to run?
Next, you tell GitHub when to run the action. In this case you want it to run when there is:
- a change on any branch and
- on any pull request that someone makes to the repository (again on any branch)
on:
  push:
    branches:
      - '*'
  pull_request:
    branches:
      - '*'
Matrix magic - running the same workflow on multiple operating systems
In the next section you create the job itself.
jobs:
  runtests:
    name: conda ($)
    runs-on: $
    strategy:
      fail-fast: false
      matrix:
        os: ["ubuntu-latest", "macos-latest", "windows-latest"]
    defaults:
      run:
        shell: bash -l {0}
runtests does a few things:
- It sets up what is called a matrix. The matrix allows you to run the same build, using different operating systems (
runs-on: $). In this case we loop through the operating system (os:["ubuntu-latest", "macos-latest", "windows-latest"]). On each run, the environment will be installed on the latest version of each operating system listed above - windows, mac and linux (ubuntu). If you really wanted to specify a version of any operating system you could do that too.
In each run Actions replaces $ with the operating system in the list
that we told it to run on.
Next, setup the Python conda environment: GitHub actions created by others
Next you need the conda package manager (and a version of Python) installed
in order to run the .yml conda environment.
Lucky for you, someone has already created a tool to set conda up for you.
The next steps call two pre-built steps that setup a conda Python environment.
- uses: actions/checkout@v2
- uses: conda-incubator/setup-miniconda@v2
There is an entire catalog of GitHub actions that others maintain that perform commonly needed GitHub Actions tasks. Most of the common tasks that you might want to do in a build are often already created.
    steps:
      - uses: actions/checkout@v2
      - uses: conda-incubator/setup-miniconda@v2
        with:
          miniconda-version: 'latest'
          channels: conda-forge
          mamba-version: "*"
          channel-priority: true
          auto-update-conda: false
          auto-activate-base: false
          environment-file: environment.yml
          activate-environment: earth-analytics-python
Above you use the conda-incubator/setup-miniconda@v2 action - maintained by
the conda community. While there are several nice conda actions available I like
this one because:
- It installs
minicondawhich is a simplified python / conda bundle. I tell my students to install that over anaconda as well to avoid conflicts and the extra tools that anaconda installs (less is more) - It also allows you to specify what channels you want to build to use (
conda-forge). Refer to the previous blog if you have forgotten about channels already. Don’t worry - we’ve all been there. There’s a lot here to digest :). - Finally it allows you to specify the environment file that you wish to run and the name of the environment that you wish to activate once the run is complete.
This action takes care of almost everything that you need to run to test your environment. And these steps are, for the most part, the same steps that you would take on your machine to:
- install miniconda
- install the
earth-analytics-pythonenvironment - activate the
earth-analytics-pythonenvironment
One thing that i’m not discussing in detail here is this argument in the build: mamba-version: "*". This build
now uses the mamba resolver which is just a bit faster as it checks dependencies
needed for the build
Final optional tests - import some packages
This last step is optional. But I found that often this spatial specific
environment would fail, not when installing, but when importing certain packages
that had strong dependencies on GDAL. Thus importing rasterio would be a
good indicator of whether the environment would run well or not. If you
recall from my previous post,
GDAL is sometimes a troublemaker when working with spatial data (in R and Python).

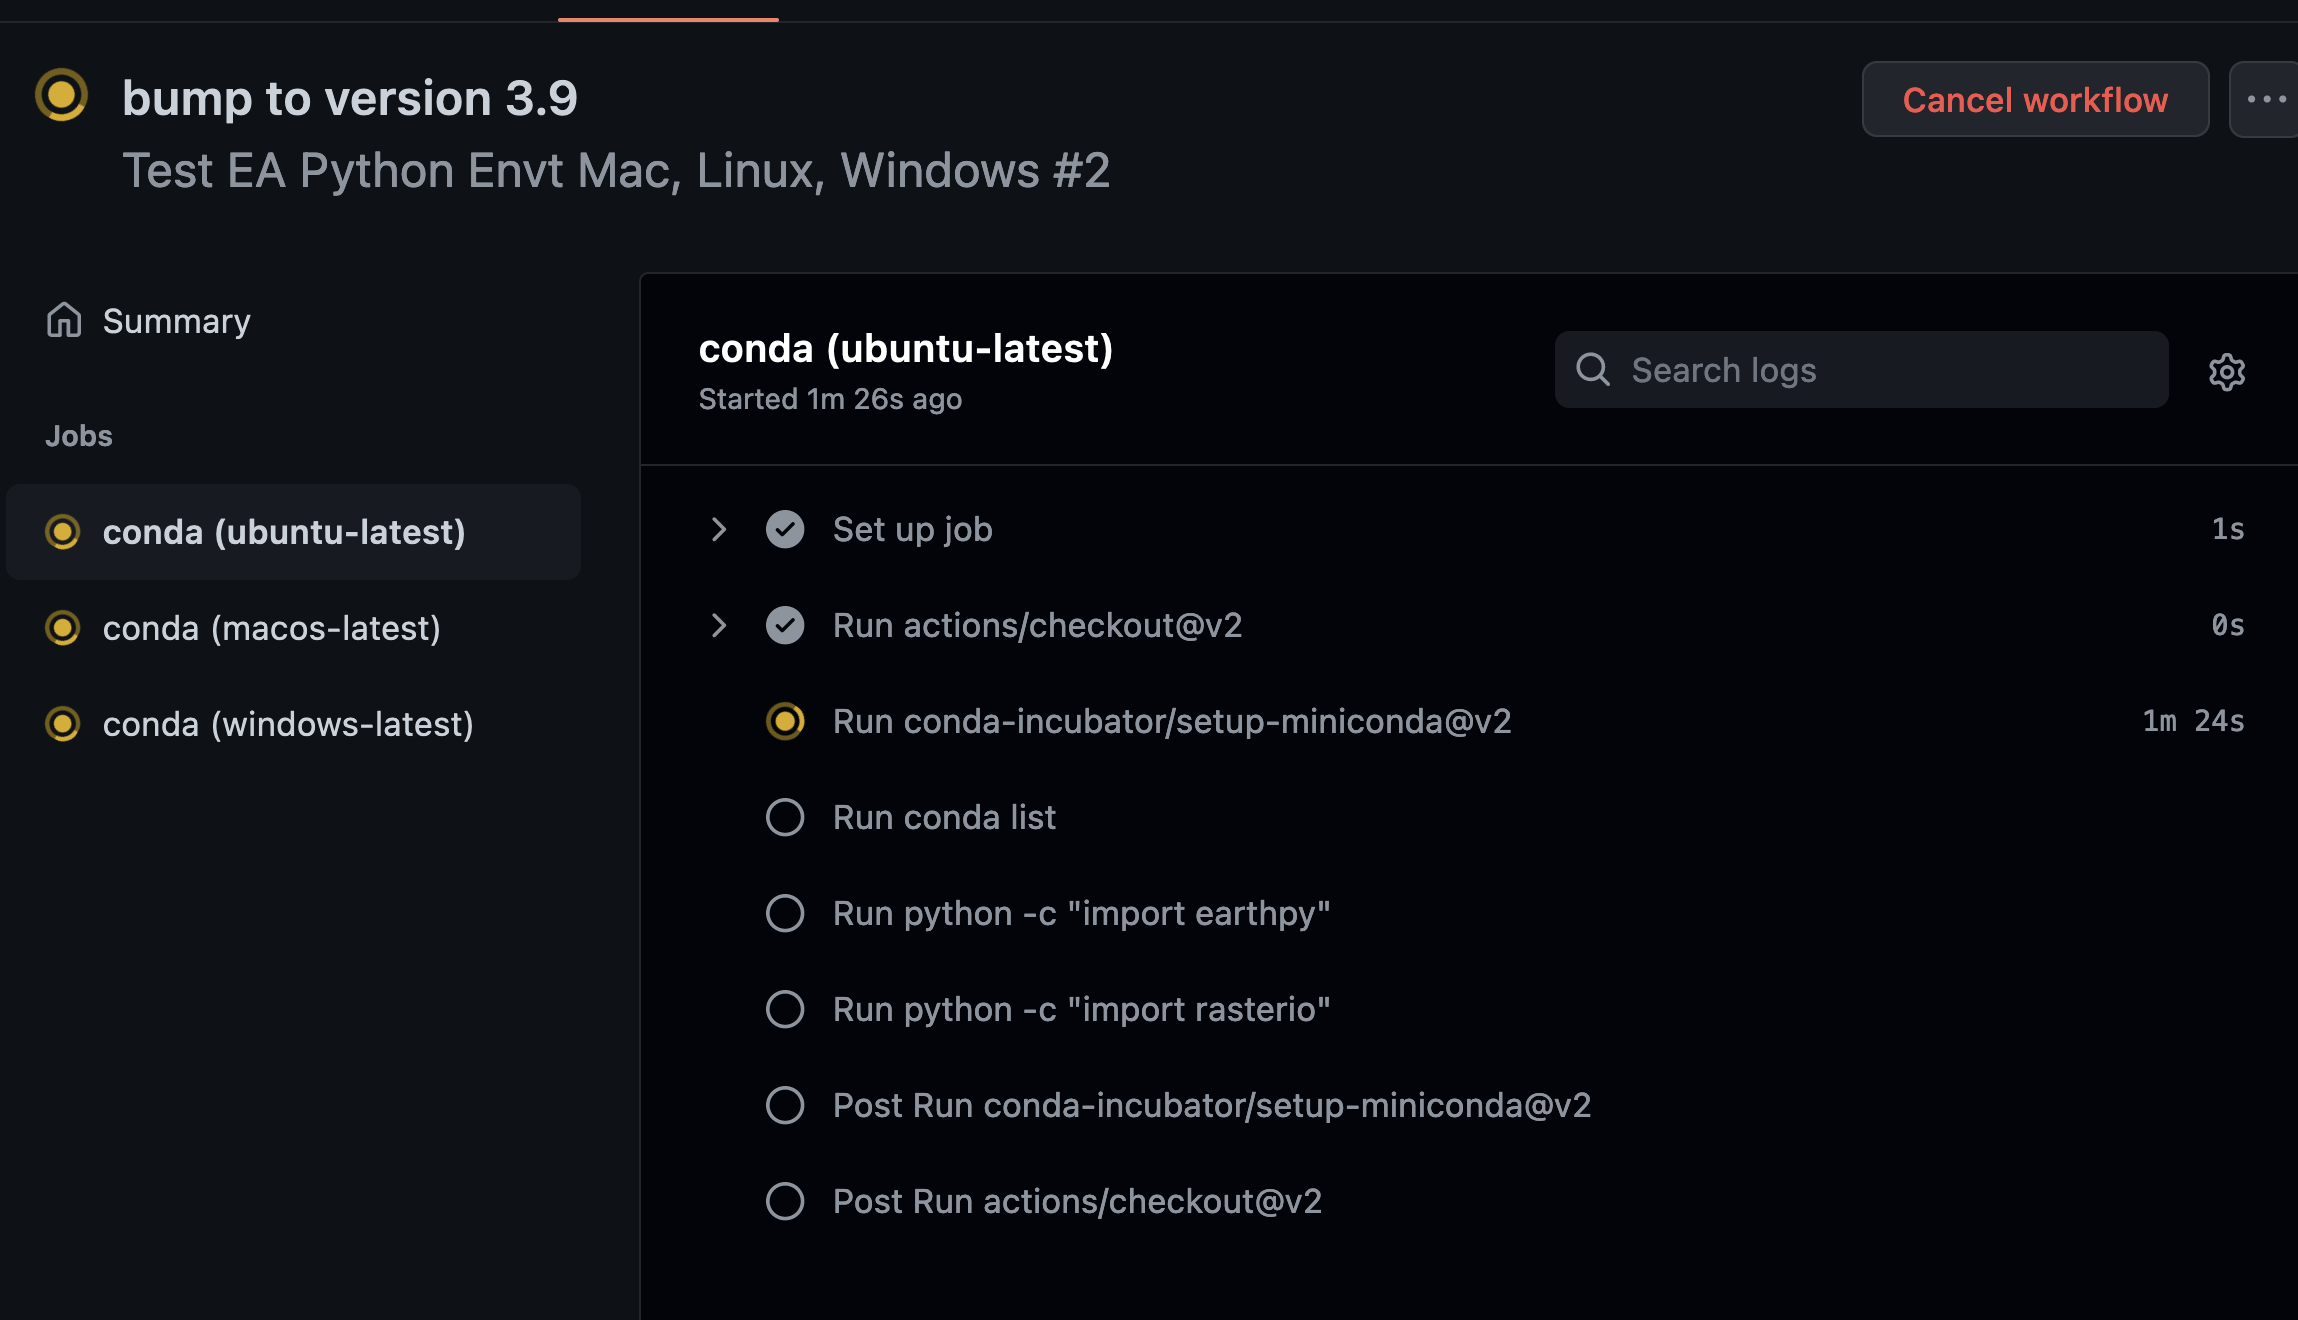
Back to the build, once the environment is setup, you activate and run some checks. Below you’re doing a few things
    - run: conda list
    - run: python -c "import earthpy"
    - run: python -c "import rasterio"
- You call
conda listto see all packages that are in our new environment. - OPTIONAL: You import two packages that I found were likely to cause issues
earthpyandrasterio
These steps are of course specific to my build and issues that I commonly saw when students were building the environment. You might chose to run a pythons script to test your build or something else that is specific to your workflow
-
The
runcommand simply tells the build to run the command at the command line. -
python -c "import rasterio"just tells the build to run the command inPython.
You can also place multiple bash commands in a single line if you wish using the | symbol. - run: |
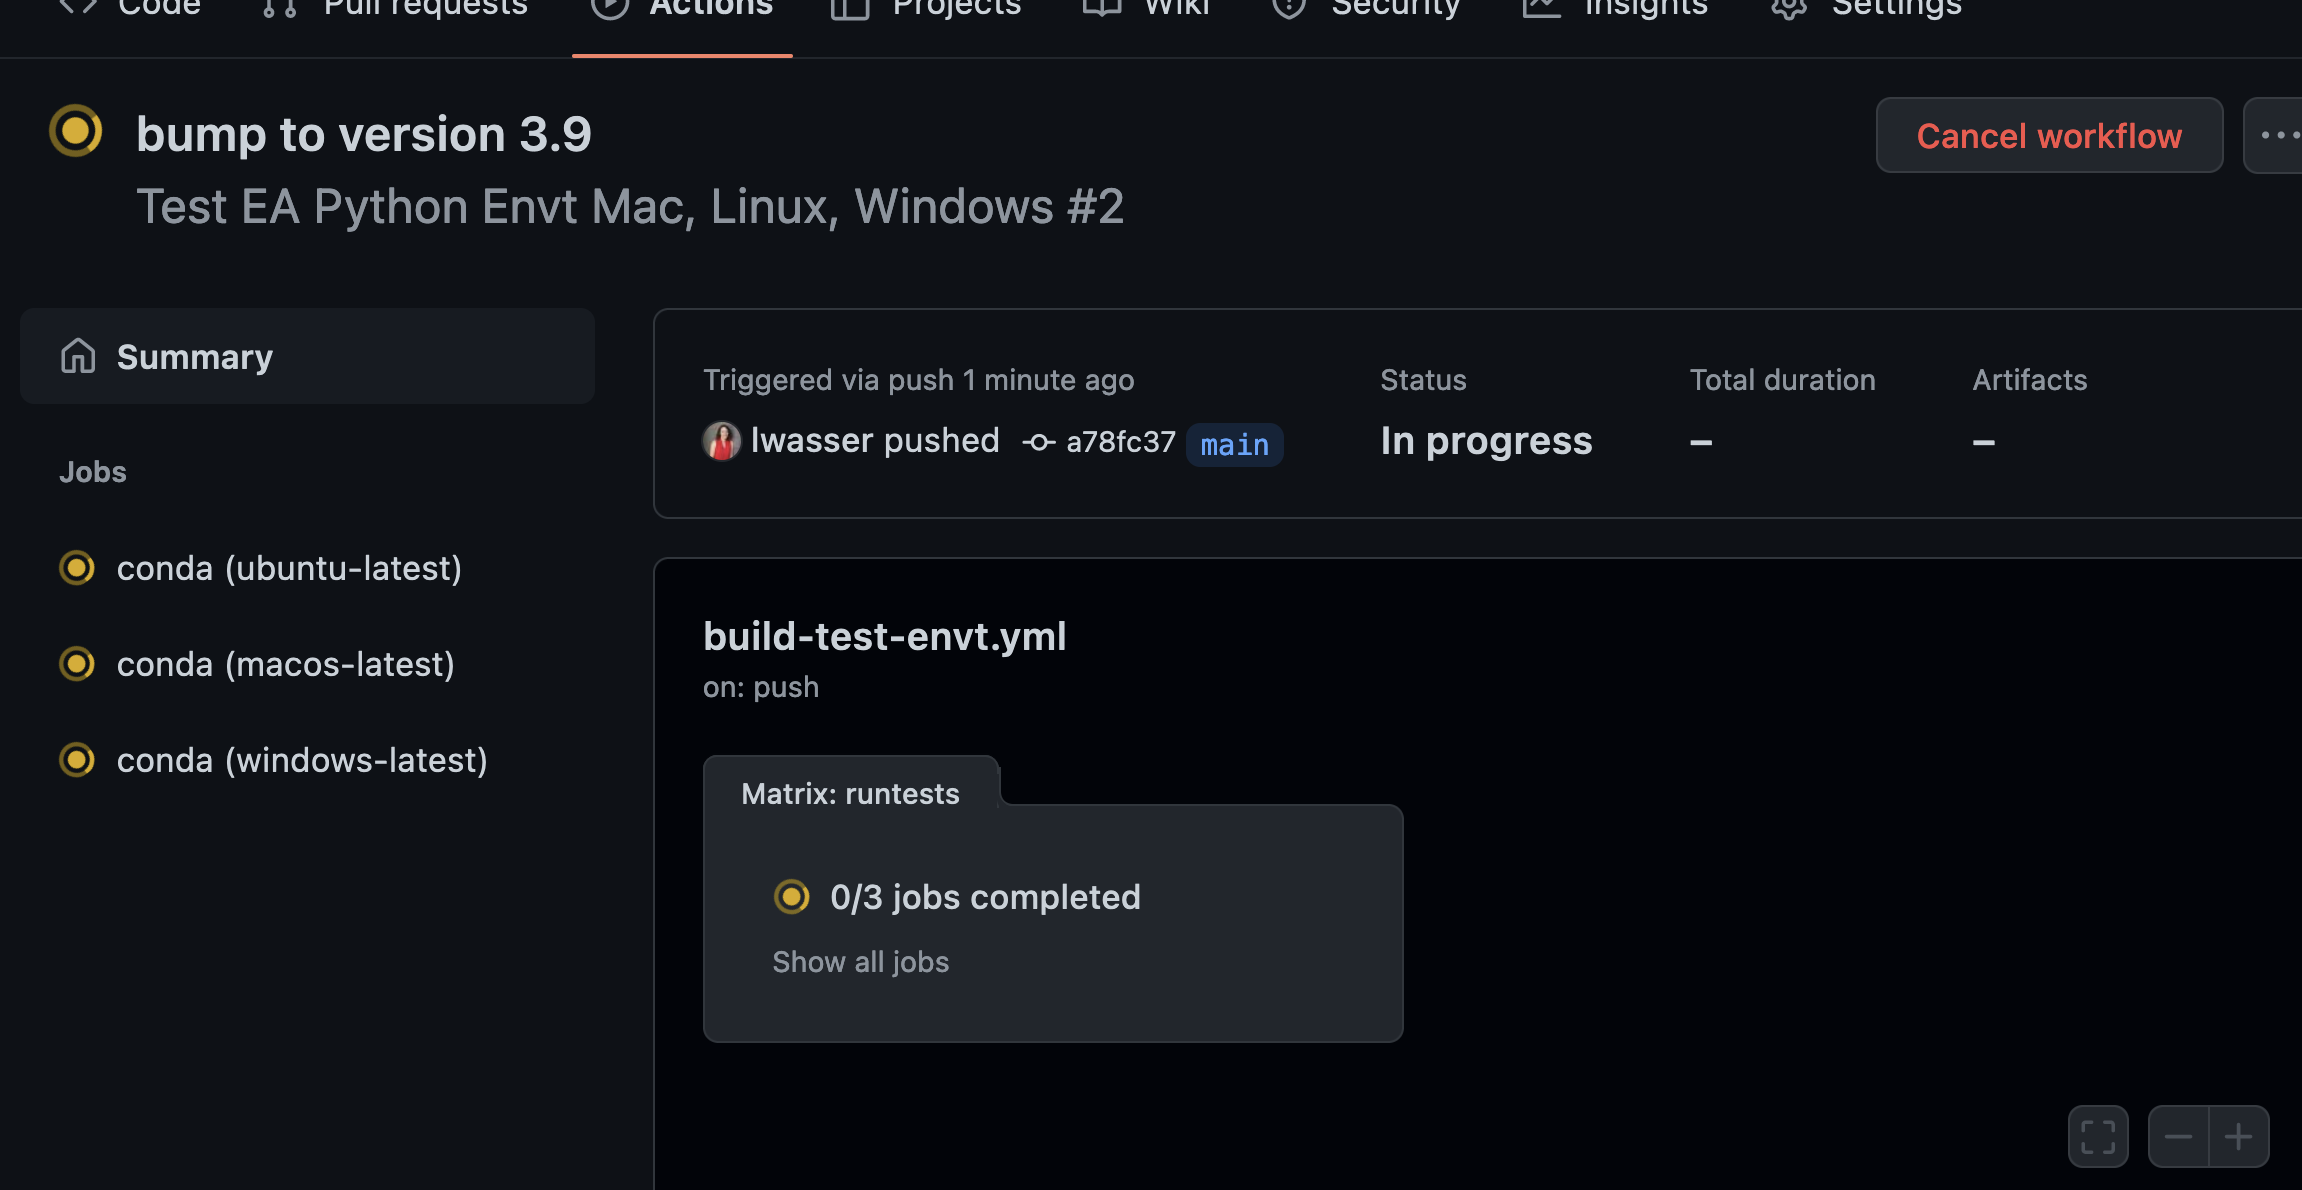
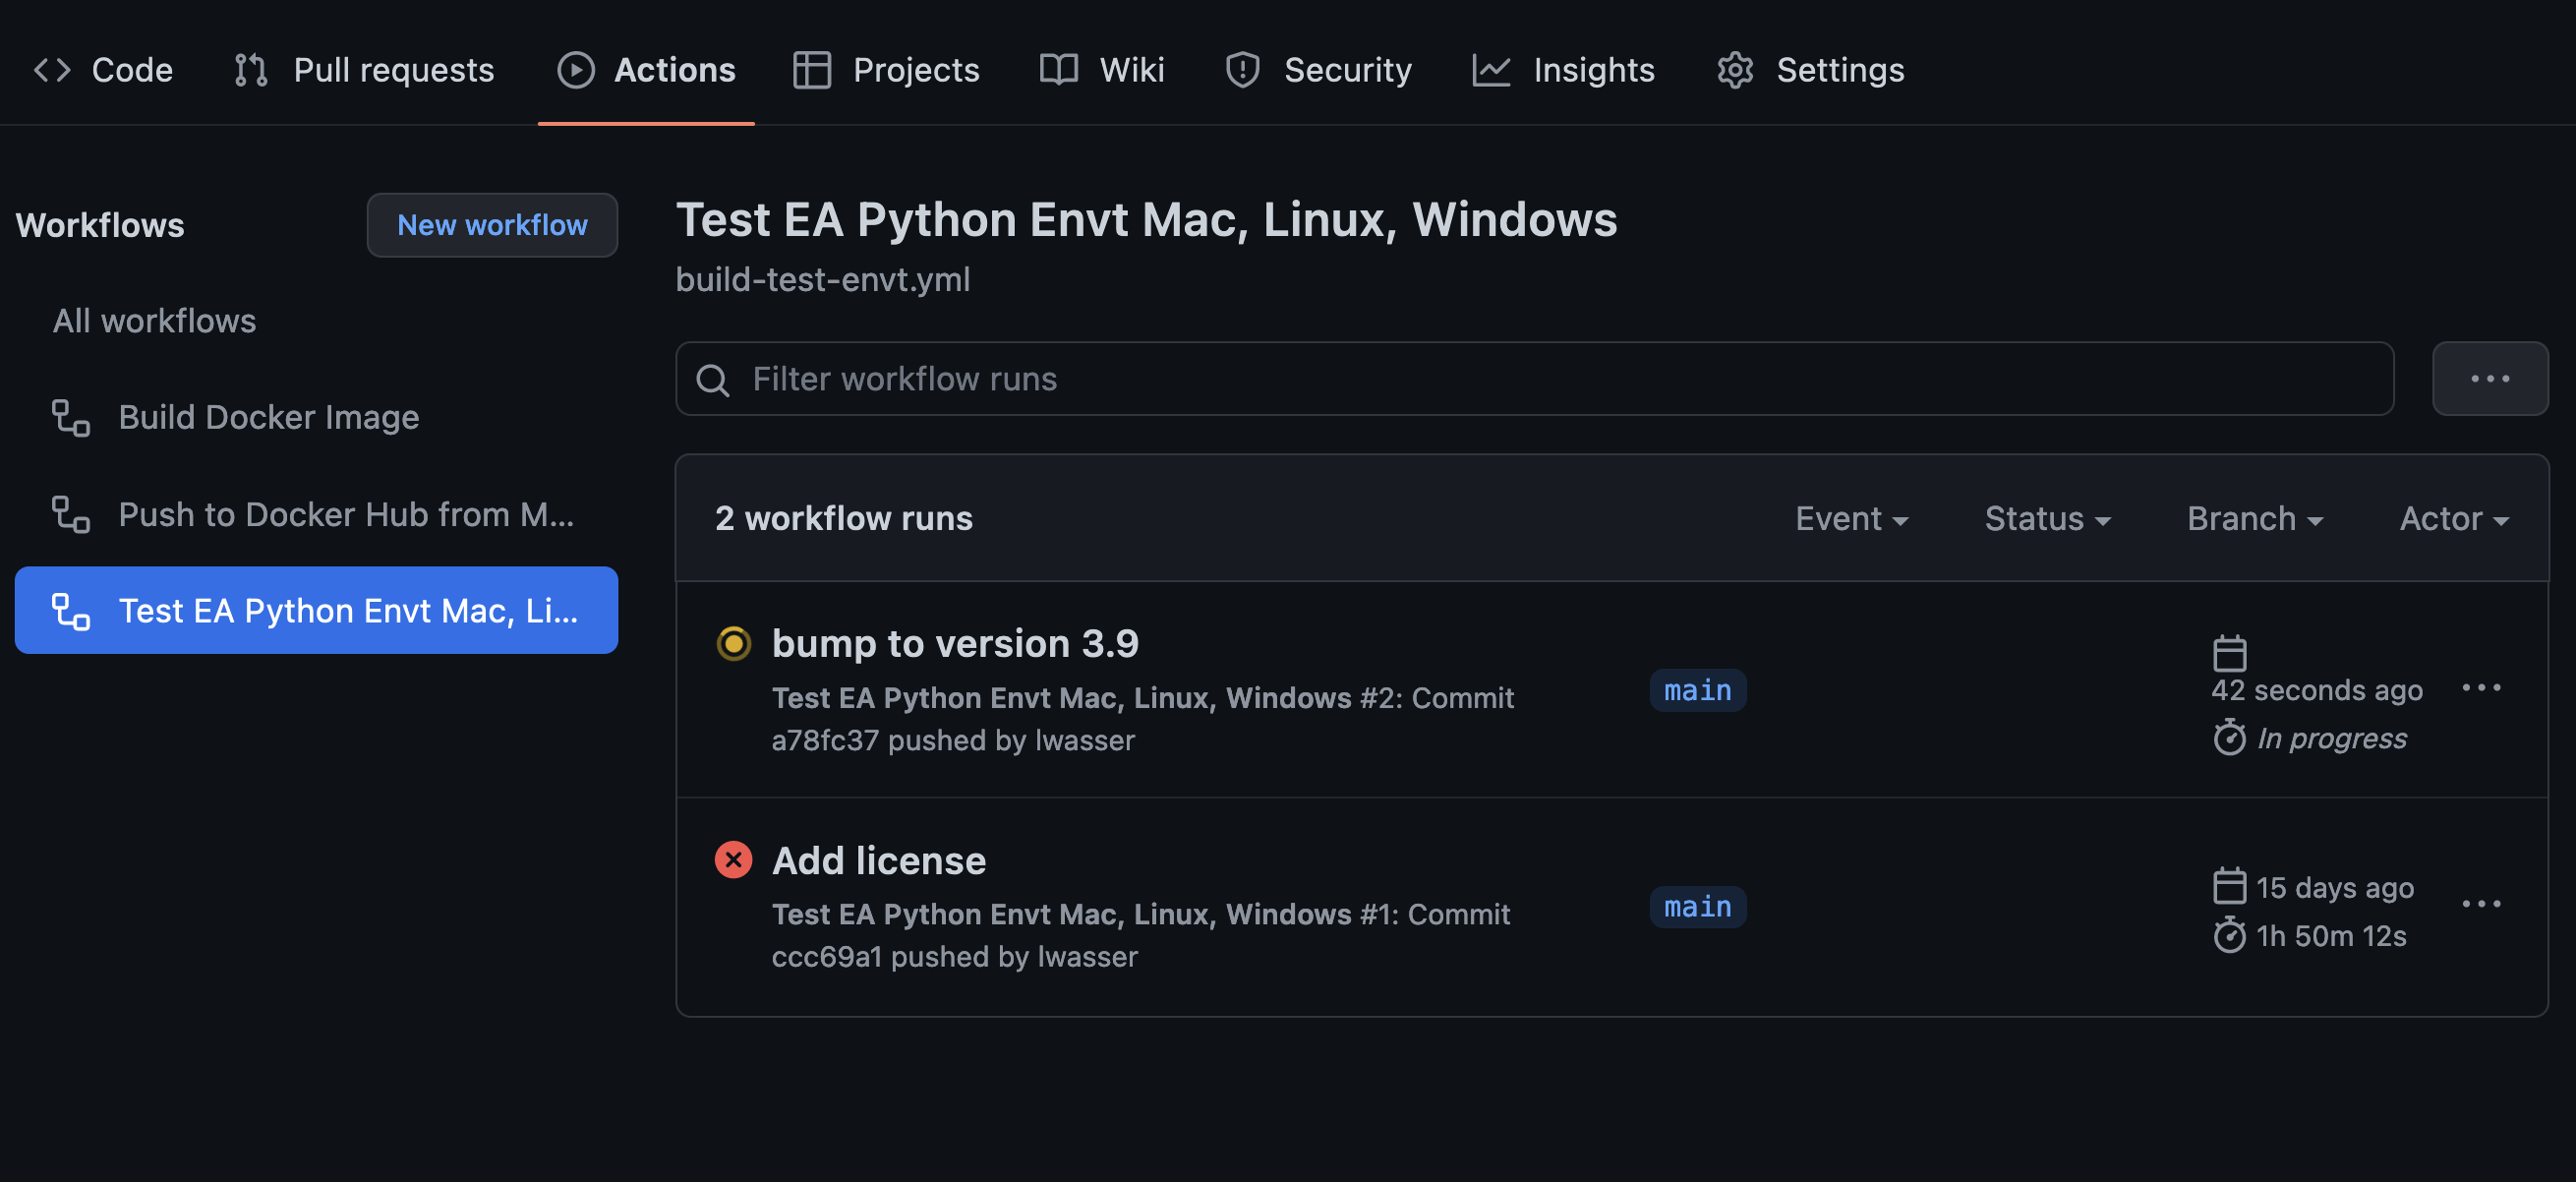
If the build runs successfully on all three operating systems, your commit will have a little green check next to it. Kind of like this:

And if it fails, it will have a dreaded red x.
If the build fails, it will give you some output telling you more about why it failed. This will allow you to trouble shoot the build.
What the build looks like on GitHub.com
Below are a few screenshots that show you what the build looks like in GitHub.
You can ignore the Docker components of the build for the time being. I haven’t set those up yet in my repository. YET.
And that’s it.
A few other things that I used this environment for
A Python conda environment file hosted within a GitHub repo can be super flexible and useful! Here are a few things that I did with this environment:
- Setup a docker container that allowed us to use the environment in different locations - such as our Jupyter Hub (I’ll write another post on that in the future. I need to rebuild this image sometime soon so it works in my account!)
- I added a quick launch from the repo of a Binder notebook for anyone who wanted to experiment with the environment online, in a Jupyter Notebook. Binder can be handy for workshops or in a pinch if you need an environment to do something.
- The docker image became the backbone of a more complex build and testing of the lessons on earthdatascience.org w. I’ll talk this too in another post.
What’s nice about this setup is that once you’ve done the work up front, it’s not a lot of effort to maintain it. It also saved me a lot of time trouble shooting student environment issues. I’d simply update the environment once a semester before classes began. Identify the potential issues with it and fix them. Then, I was good for the next 4 months.
Thanks to these awesome people who contributed to this build!
Before I sign off, I want to take a minute to thank some of the awesome people who contributed to the development of this build over the years:
- Filipe Fernandes
- Tim Head
- Karen Cranston
- Max Joseph
- Nathan Korinek
Thoughts? Comments?
So that is how I address the mighty Python environment problem for both teaching and science workflows.
I’m curious if others have run into this issue with Python environments. Please leave a comment below if you have any thoughts or approaches to share.